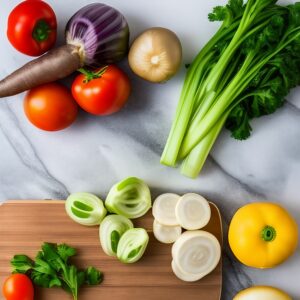
Homesteading can be a great way to bring nature into your life and gain a deeper understanding of where your food comes from. Starting a garden or raising animals for milk, eggs, or meat can be an incredibly rewarding experience. You don’t have to move onto a farm to homestead either; anyone with access to land and some basic resources can start homesteading. Once you have all this excess food you need to start thinking about canning and preserving your hard work.
Preparing for home canning
Consider your specific needs and the amount of food you need to preserve. This will help you determine if you want to pressure can or dehydrate your food. Research the different types of jars, lids and tools that are available for each process. Find recipes.
The most important piece of equipment for canning is a pressure canner. Pressure canning is required to preserve low-acid foods like vegetables and meat, so it’s essential for people who want to can food from their own homestead. Pressure canners are large pots with a lid that tightly seals and has a venting system. The pot also comes with a wire rack or basket to hold jars in place during the canning process. In addition to the pressure canner, it’s necessary to get the right tools for measuring headspace, filling jars, adjusting lids and removing air bubbles. These tools include a jar lifter, bubble remover (chopstick), funnel. All the other extra stuff is fluff and not really that useful.
It’s important to make sure you have enough jars on hand for your preserving project. Mason jars are perfect for home canning projects because they come in different sizes so you’ll be able to choose the size of jar depending on what type of food you plan on preserving. We personally like widemouth jars. Once you’ve chosen your jars, make sure you buy new lids that fit perfectly on each jar for an effective seal when processing your food.
In order to safely can food at home, it’s important to practice proper sanitation and follow a few key safety considerations. Wash jars, lids, and utensils with hot, soapy water before beginning the canning process. Make sure the jars and lids have no scratches or blemishes that could compromise the seal when processing your food. Additionally, it’s important not to fill jar too full as this could prevent air bubbles from escaping during the canning process which can cause spoilage in the long run. Finally, make sure you always follow the appropriate heat processing time chart for each type of food you are preserving – this will ensure any harmful bacteria is destroyed during the process.
Once you have your jars, lids and utensils properly cleaned, it’s time to start the canning process. Begin by packing the hot food into the jars. Make sure not to fill them too full as this could prevent air bubbles from escaping during the process. Once filled, you will want to release any remaining air bubbles by running a chopstick around the inside edge of the jar before sealing. Place lids and rings on each jar and twist until finger tight. (don’t over tighten) Then, place all of your sealed jars in pressure canner, making sure they have at least a couple of inches of water covering the bottom. Waterbath canning is different than pressure canning. Process according to the specific heat processing time chart for the type of food being preserved. Finally, remove all jars from canner with a jar lifter and allow them to cool before checking for seals.
If successful you should hear the seals start to pop on the lids. Try not to put the jars in a drafty or cold location while cooling.
Once the jars are cooled, it’s time to store them. The best way to store home canned mason jars is in a cool, dry place that has no direct sunlight. A pantry or basement work well for storing food in jars. Be sure to keep the lids on the jars but the rings don’t necessarily have to remain and make sure there is a bit of space between each jar for air circulation. Label your jars with the date they were canned as well as what’s inside so you can easily access what you need when preparing meals. Remember to check your canned goods every few months and discard any that have been exposed to extreme temperatures or have lost their seal!
Once you have finished canning your foods, you can create some delicious and healthy recipes with them. For example, if you have canned tomatoes, try making a homemade tomato sauce or marinara. If you have preserved vegetables such as peppers, carrots and onions, use them in soups or stews. You can even make your own pickles with cucumbers and other vegetables. With fruits like apples, peaches and oranges, you can bake pies or cobblers for a sweet treat. The possibilities are endless when it comes to recipes made from home-canned goods!